For the penultimate part of this series, I’m going to look at something a bit more complex, reposing limbs. It’s something that I’ve done a few times and it can be very, very frustrating. On the other hand, it gives a unique pose. I have to admit that the example shown here was not my most successful attempt, I used Tactical Marine legs (as that’s what I’ve got at the moment) rather than the running legs available in the Space Wolves Pack kit, and not only is the Tac Marine pose a bit weird it’s a bit of a nightmare to repose as I had to adjust the ankle as well as the knee and hip joints. I suppose that my first bit of advice then is to try to pick a limb (or set of limbs) that is as close in shape to the final pose as possible.
The second thing to look at is the material from which the limb is made. Oddly enough, given its reputation, Finecast is easier to work with than plastic in this case as limited reposing can be done using a hairdryer. All you need to do is heat the limb for about thirty seconds (hairdryers vary so I’d recommend heating then testing every few seconds) before gently bending them to the right shape. I had to repose a set of Shining Spear legs this weekend and it took seconds in order to pose them. If they had been plastic it would either have relied on judicious shaving of limbs and mount or several hours with wire and scalpel and if they had been metal, well, I’d probably have ended up sitting on the floor rocking back and fore trying to figure out how to jam them together.
For this article I’m going to start with reposing legs. I’ve done this a few times now (well, at least four) and it’s fairly straightforward, it just requires a bit of work, some planning and a lot of patience. As I play a Space Marine variant army I’m going to use Marine legs to do this. It should also be possible to do something similar with other races but you’ll need to think about how you’ll model the joints as power armour has convenient corrugated bits at the joints (can’t think of the proper name for them right now). You will need:
- a set of Tactical Marine legs. Other variants are fine. In fact it’s probably easier to use running legs as I did for my Rune Priest and this Swiftclaw.

- Green stuff
- Some fairly stiff wire (~1mm in diameter)
- A scalpel
- modelling tool with a pointy end
- file
- wire clippers
- drill bit (slightly wider in diameter than the wire)
- Super Glue
- A plaster/bandaid (at least if you’re me)
The first job is to stop and think. I’m serious, honest! Before you cut anything you need to consider what pose you’re planning and how you’re going to do it. Are you just shifting one knee so that the guy is striking a heroic pose or are you going to have to move every joint? Is the pose anatomically possible? I have been known to try and pose heroically on a chair to try and figure out what I’m about to do. Fortunately my boyfriend hasn’t taken any photos as I don’t do heroic particularly well!
The next job is to cut up the set of legs. I use a scalpel rather than a razor saw as it removes less material (if somewhat more finger). If you’re going to be doing a lot of joints, you may want to label them.

Then you need to drill through the cut up pieces. If a piece needs connecting at both ends (such as the thighs of the example), drill all the way through, otherwise drill deep enough into the plastic to hold the wire securely just as you would when pinning.
Then thread the wire through, gluing it in place. Leave enough space at the joints so that you keep the model’s proportions once it is posed. Using wire lets you repose the model a bit, so that you can get it just right.

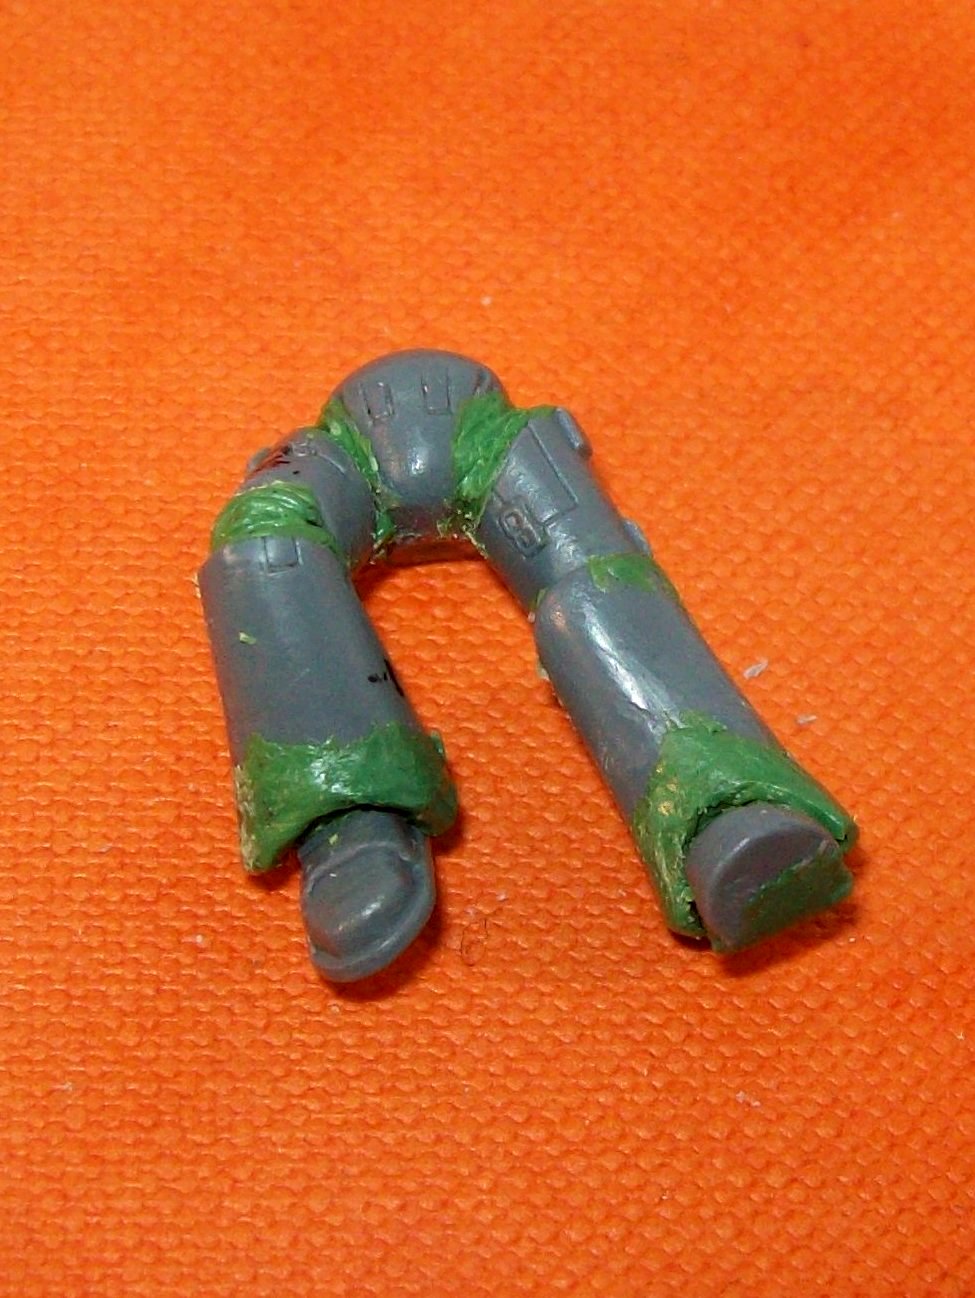
Next up, you need to use green stuff to fill in the joints and tidy up any mess you made when cutting up the model, such as with the ankles on the example legs, which had to be dug out rather than cut cleanly. Please take your time when doing this. Do one joint at a time and wait for it to be set before starting the next one. I’m serious. If you store mixed together green stuff in the freezer it will stay soft for about a day and a half. Simply warm it in your hands for a minute or so before using.
File or sand any rough edges and your reposed legs should be ready to use. I’ve used the same technique to repose arms too.

A simpler way to repose arms is to play with how the limb connects to the body. You can trim and file the joint before filling in any gaps with green stuff. It’s much simpler than making a new joint but is only really suitable if you just want to tweak a pose slightly.

There’ll be one last post in this series but I need to find the bits, something which is turning out to be harder than I thought.
L.o.F.


